• Skip to primary navigation
  • Skip to main content
  • Skip to primary sidebar
  • ABOUT US
  • MEDIA
  • PRIVACY
  • TERMS
  • DMCA
  • CONTACT US
  • AUTHORS
do you remember

DoYouRemember?

The Home of Nostalgia

  • Celebrity News
    • Family
    • Obituaries
    • Life Behind the Fame
    • ICONS
    • Celebrity Feuds
  • Entertainment
    • Cast
    • Showbiz Rewind
    • Music
    • Beauty & fashion
  • STORIES
  • Celebrity Buzz!?
  • Sitcoms
    • Bewitched
    • Little Rascals
    • The Partridge Family
    • I Dream of Jeannie
    • All in the Family
    • MASH
    • Happy Days
    • Cheers
  • Celebrity Collections
  • SHOP DYR
    • DYR Book

Stories

How To Clean A Vintage Rain Lamp

by K. Gitter

Published September 5, 2017

How To Clean A Vintage Rain Lamp

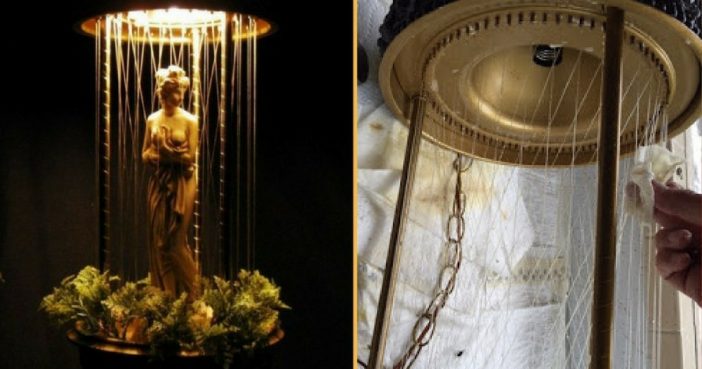
I’ve always wanted a vintage rain lamp and after searching for a while, I finally found one on Craigslist at a decent price. It was only $35 and listed under “vintage lamp.” We quickly made our way over to pick it up, only to find out they had used motor oil in the lamp. After dumping most of it out, I carried it home in a trash bag- what a mess.

Tricia Barrett

If you aren’t familiar with rain lamps, they were popular in the 60s-70s and used a thick fishing line where oil runs down giving it the appearance that it is raining. They come with a variety of figures inside- from a mill wheel to a dancing couple. My lamp has the “Venus” figurine with plastic orange flowers. Perfect, just what I wanted!

Related:

  1. The Allure of the Lava Lamp and How It’s Made
  2. Stunning ‘A Christmas Story’ Display Features Giant 20-Foot Leg Lamp

What, they are not swag lamps! This is a swag lamp…

Tricia Barrett

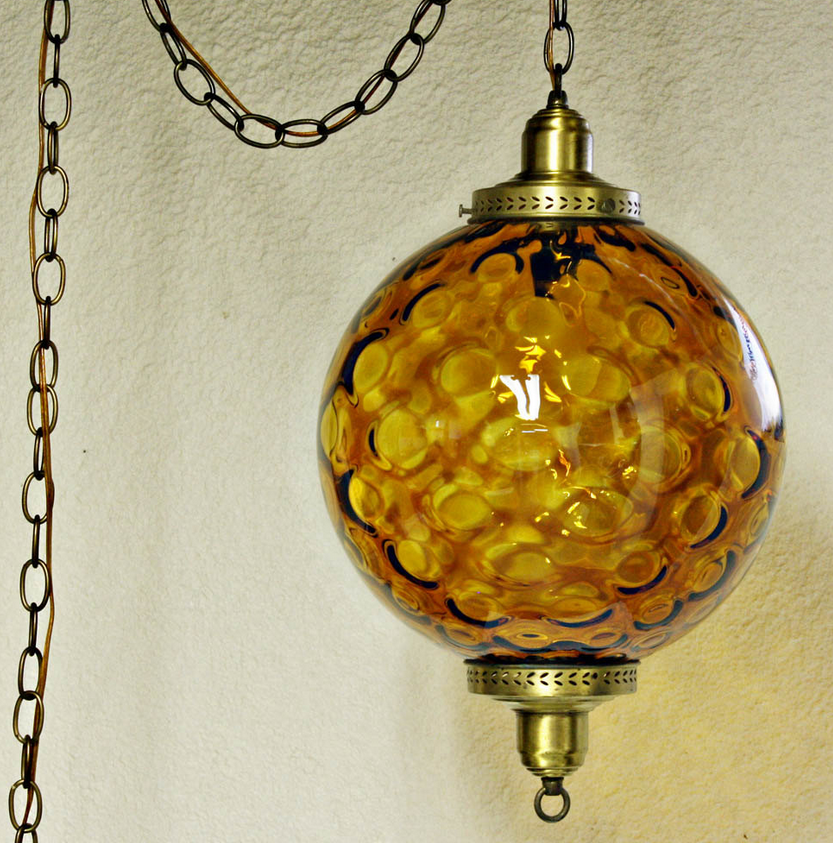
They are also not oil lamps. This is an oil lamp.

Tricia Barrett
So now that we have the basics out of the way, there isn’t a lot of information online about these lamps. We knew we had to clean it, I don’t think it had been touched for forty years and as you can imagine, the oil attracts all sorts of dust and bugs- the motor oil didn’t help.

So, we set aside a whole day one weekend to clean this beauty up. It took about six hours total. The dirt was so caked on the leaves of the flowers that even after soaking them, each petal still had to be scrubbed by hand to get the grime off- both sides.

I thought I would put this tutorial together for anyone that needs to clean their own rain lamp. This is what worked for hours – use at your own risk, they can be fragile, and if you break a strand you will be in for a lot of work restringing.

Tricia Barrett
The first thing we did was find a large flat work space and lined it with plastic bags and paper towels- you are going to need A LOT of paper towels. This is a messy project.
Tricia Barrett
Here you can see the black gunk stuck on the strands and in the holes at the bottom, along with the black filth stuck inside the flowers. To begin, make sure your lamp is empty of as much oil as possible.
Tricia Barrett
First, we very gently removed Venus, the light bulb, and foliage. You can only do this by putting your hands through the filaments and weaving the items out. Be very careful. The fishing line is sturdier than you think, but it is still a very delicate process. I gently scrubbed her with Dawn dish soap to remove the dirt and oil.
Tricia Barrett

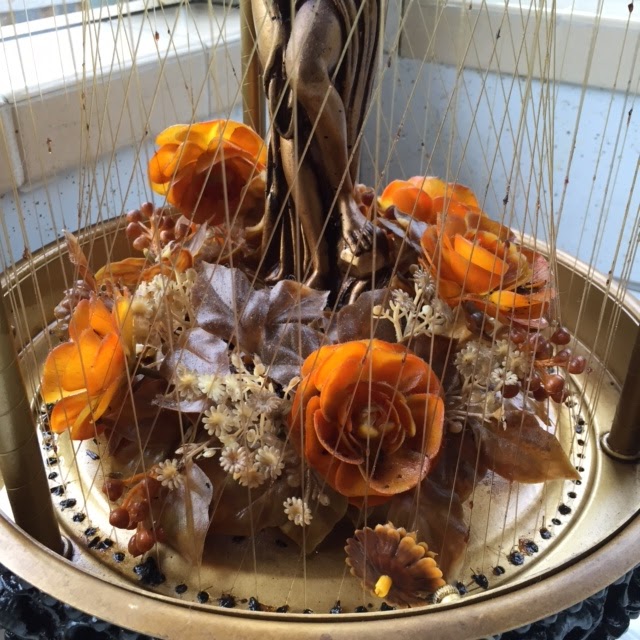
Unscrew the base pieces from the lamp. I placed the bottom “tub” and all of the foliage in hot water with Dawn soap to remove the oil and grime.

Tricia Barrett
Once the bottom is removed, you should see your motor. Ours had what looked like to be a date on it (hopefully) so we are crossing our fingers that it is a newer motor that has been replaced. It used to be that once your motor was ruined, you were basically out of luck as it was nearly impossible to repair. Luckily, someone had listed replacement motors on eBay, so if you burn out your motor, you can probably replace it.
Oil rain lamps by SteamPunk Steele
We wiped down the motor as much as possible to remove any of the leftover motor oil.
Tricia Barrett

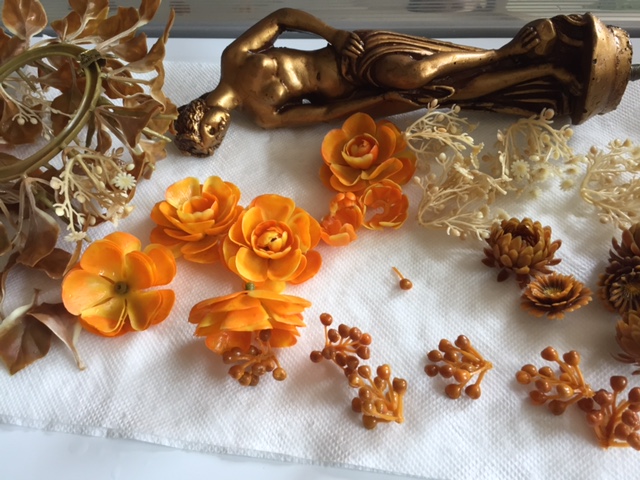
I had to scrub every petal and leaf by hand. The dirt was so stuck on with grease that the soak didn’t remove it. This process took the longest. I placed them on a paper towel to air dry.

Tricia Barrett

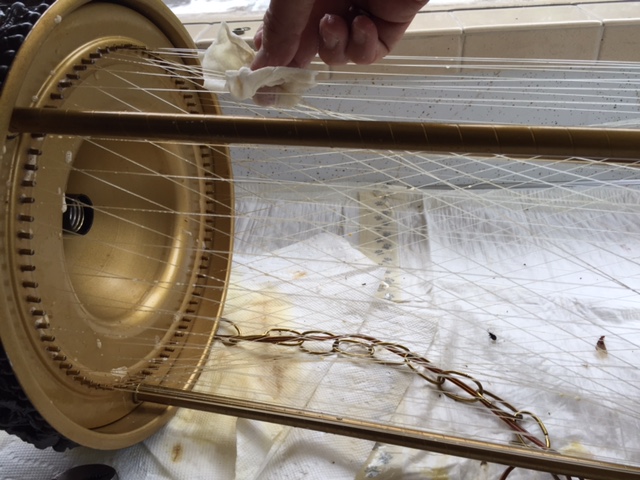
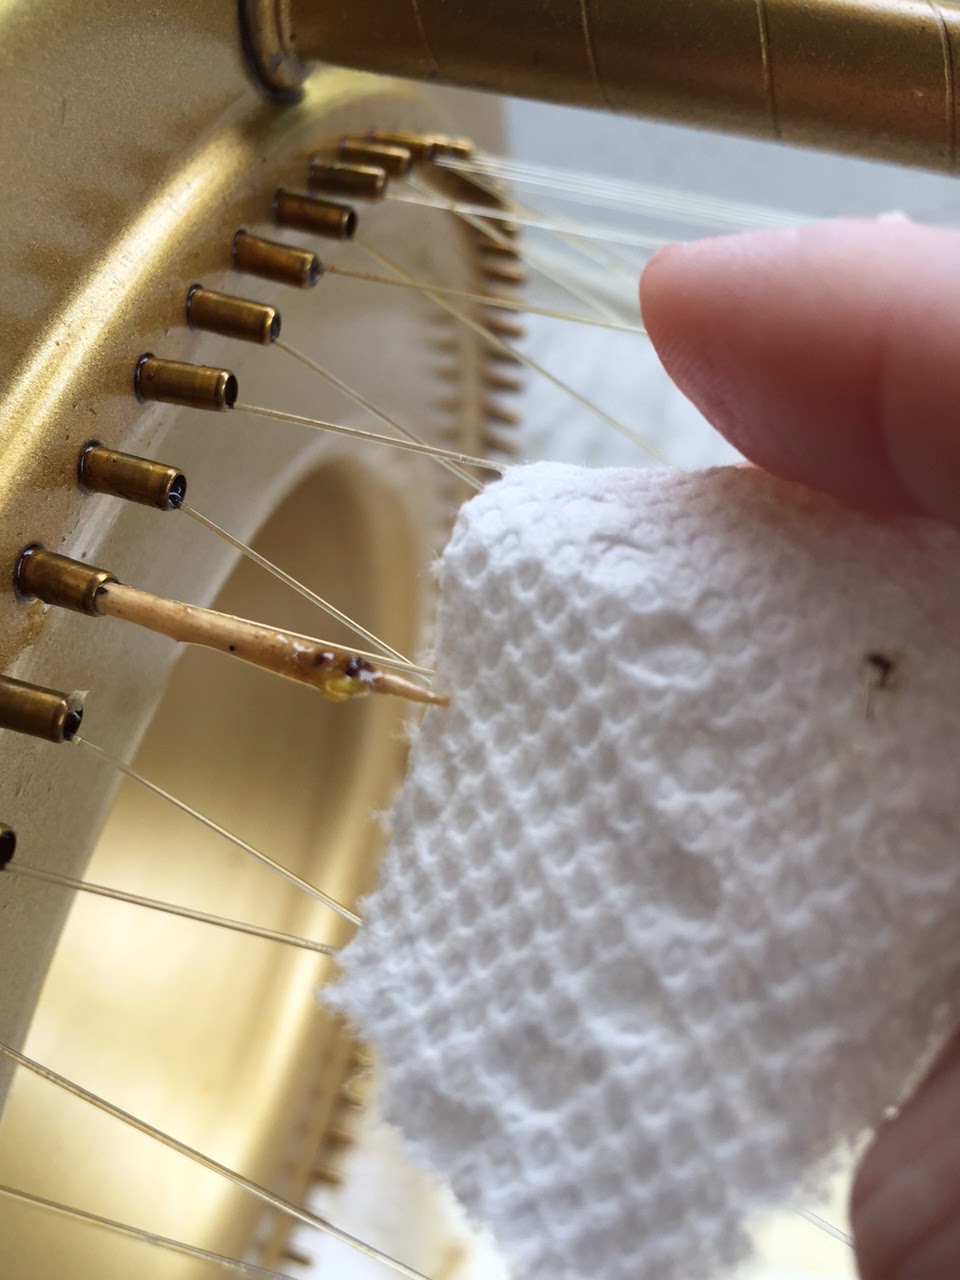
We used a paper towel to wipe the gunk off of every filament.

Tricia Barrett

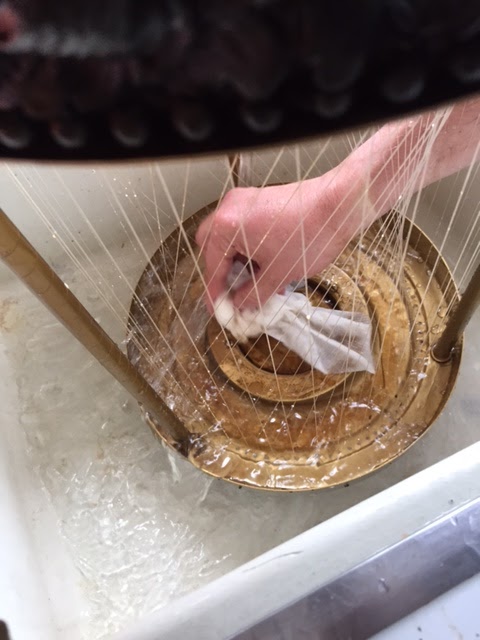
We then went ahead and washed the entire base with water and Dawn. There was a lot of dirty oil stuck in here and we wanted to get it all cleaned out.

Tricia Barrett

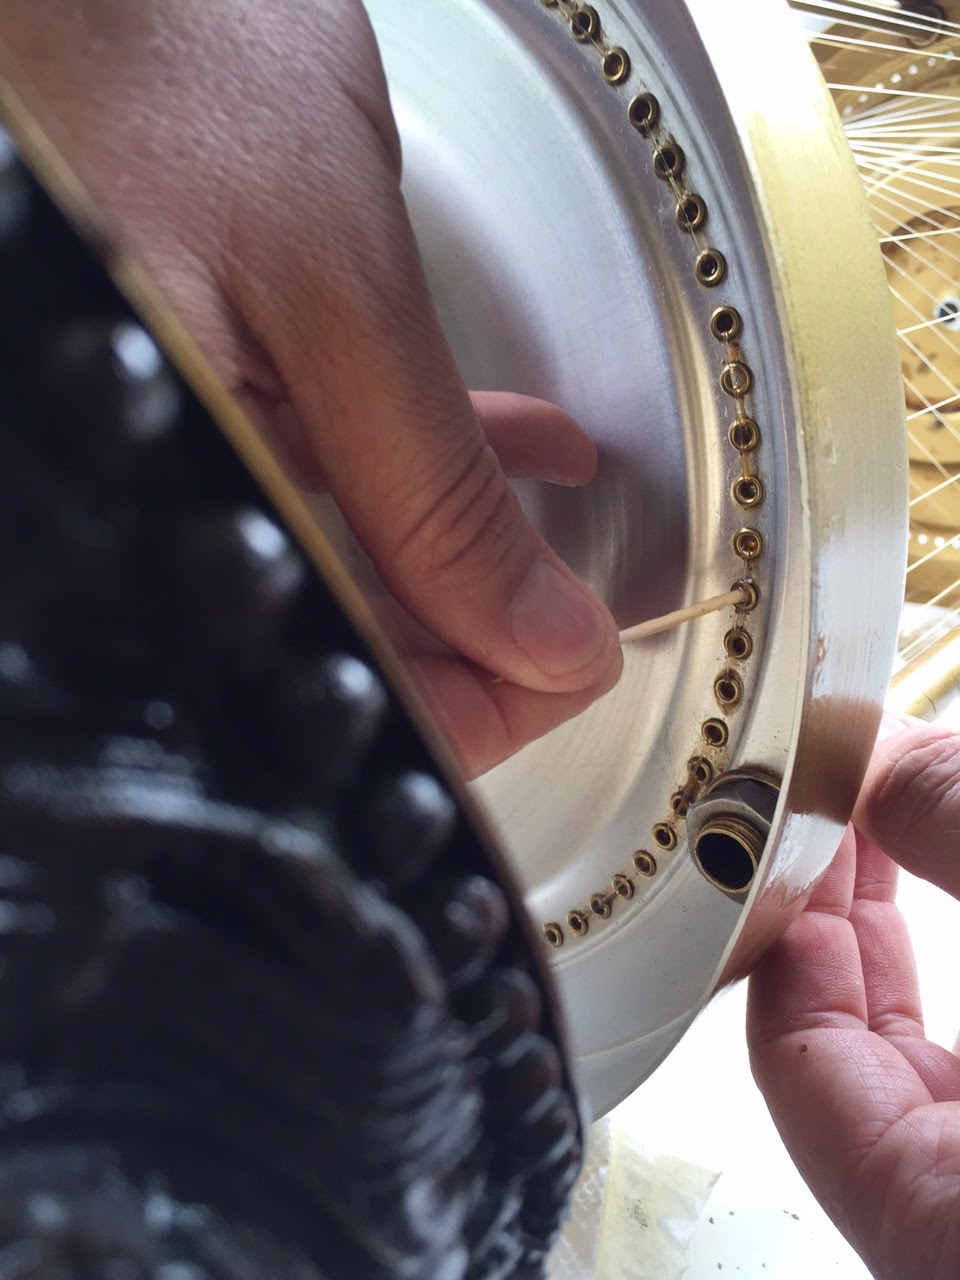
We used a toothpick in all of the holes in both bases to remove any build up.

Tricia Barrett

As you can see, there was a lot of motor oil and dirt inside the holes. This can block the flow of oil if it isn’t cleaned out.

Tricia Barrett
The fun part was putting it all back together. Just like above, you have to squeeze everything back through the filaments. When you put the flowers in, make sure none of them are touching any of the fishing lines.
Now for the fun part! After all of this work, we wanted to make sure she has a place of prominence in the house. So we hung her right in the entryway when you come in the front door.
Tricia Barrett

She is just as beautiful now as she was in 1967!

Click NEXT to see the rest…

Page Page 1 of 2
Previous article: McConaughey, Clooney And Roberts Among Stars Coming Together To Participate In Hurricane Harvey Telethon
Next Post: 10 Things That Still Bother Me About “The Parent Trap”

Primary Sidebar

© 2025 DoYouRemember? Inc.

  • about us
  • media
  • privacy
  • terms
  • DMCA
  • CONTACT US
  • AUTHORS