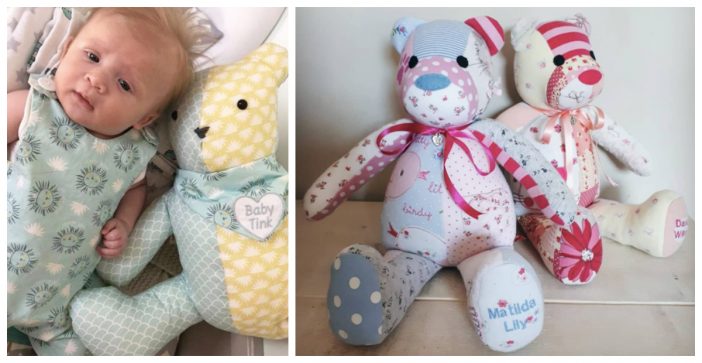
If you’re a proud mom or dad, then you definitely don’t want to throw away your child’s old baby clothes. And you don’t have to! “Memory Bears” are the newest DIY trend that allows you to keep your child’s baby clothes as a keepsake while turning it into something useful.
Making a memory bear requires only a few things. Old baby clothes, a sewing kit, and a bear. Once the bear is finished, it will be completely encompassed in your child’s old onesie and you’ll be super nostalgic for those old times.
https://www.instagram.com/p/Bkub2JSH1ZP/?tagged=memorybears
If you’re looking for a structured, step-by-step guide, follow the steps below to create your first memory bear!
Step 1: Gather all of the materials you’re going to be using. You’re going to need a sewing kit or machine, so make sure you have that handy as well. Lay out everything you’re going to be using.
Step 2: Trace all the pieces included in the kit and cut around them leaving around 1/8 of an inch around the borders. Iron out the interfacing pieces with sticky glue facing the back of the fabric. Then, cut the pieces out accurately on those traced lines.
https://www.instagram.com/p/Bk3CKtShgZp/?tagged=memorybears
Step 3: Sew different pieces together like the face and the forehead of the bear. Follow-up with the eyes and ears, side pieces, and the back of the head. Continue on with the rest of the body piece by piece until the bear is completely covered.
Step 4: Stuff the bear! Start off with the legs, arms, head, and then the tummy area last. Then sew up the remaining opening.
https://www.instagram.com/p/BkYe6dZHAsU/?tagged=memorybears
There’s really no right or wrong way to do it. If you’re not a huge sewer (like me) just sew it all up according to how you want it to look! As long as your bear holds the memories of that onesie, that’s all that matters.
https://www.instagram.com/p/Bk4OUjKh1RS/?tagged=memorybears
Be sure to SHARE this article if you love this memory bear idea!